On the Select installation type screen, ensure Role-based or feature-based installation is selected, and then click Next.
On the Server selection screen, click Next.
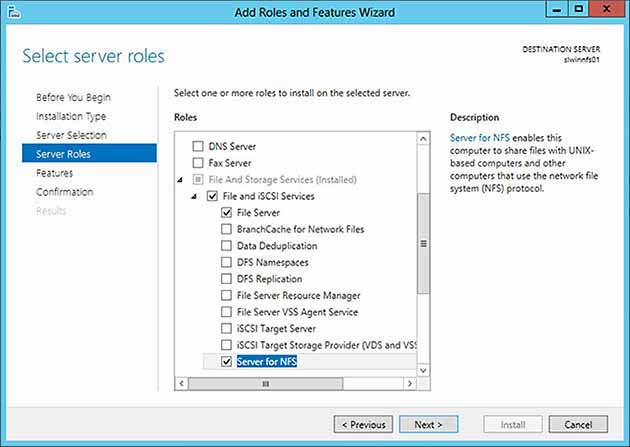
On the Select server roles screen, expand File and Storage Services, expand File and iSCSI Services, and then check Server for NFS.
Click Next.
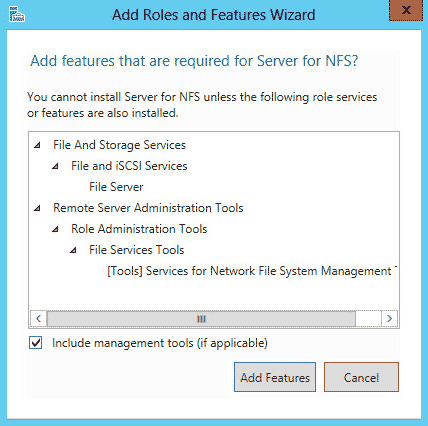
If an Add features that are required for Server NFS dialog box appears, click Add Features.
On the Select feature screen, click Next.
Confirm the installation details, and then click Install.
Configure an NFS Share
Launch File Explorer.
Create a new directory for your NFS share.
Right-click the directory and click Properties.
Select the NFS Sharing tab.
Under the NFS Sharing tab, click the Manage NFS Sharing… button
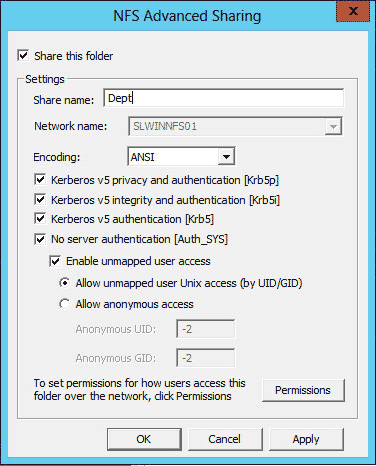
Check the Share this folder check box.
Enter a name into the Share name text field. This will be used when a user connects to your NFS share.
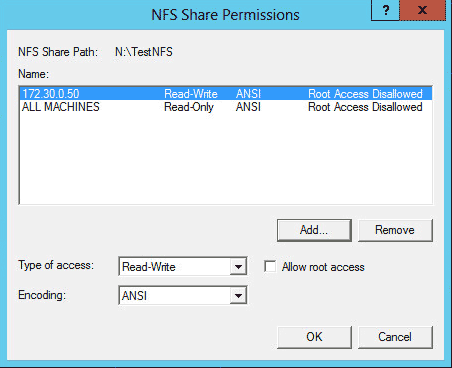
Click the Permissions button.
Click Add and then enter the IP address or hostname of the client(s) you want to allow connections to. When added, you may also select whether they have readwrite access or read-only access.
Click OK.
Click Apply and then OK.
You now have a simple NFS share hosted on a Windows Server 2012 R2 box.
Connect a Linux Client to the NFS Share
Log onto a Linux server or desktop.
Open a terminal window, if you are in a Desktop version of the operating system.
Create a new directory to mount the Windows NFS share.mkdir /postprod
Mount the NFS share to the new directory.mount.nfs slfileserver01:/postprod /postprod
If the client has readwrite access, test the share by creating a new file.touch file01.txt